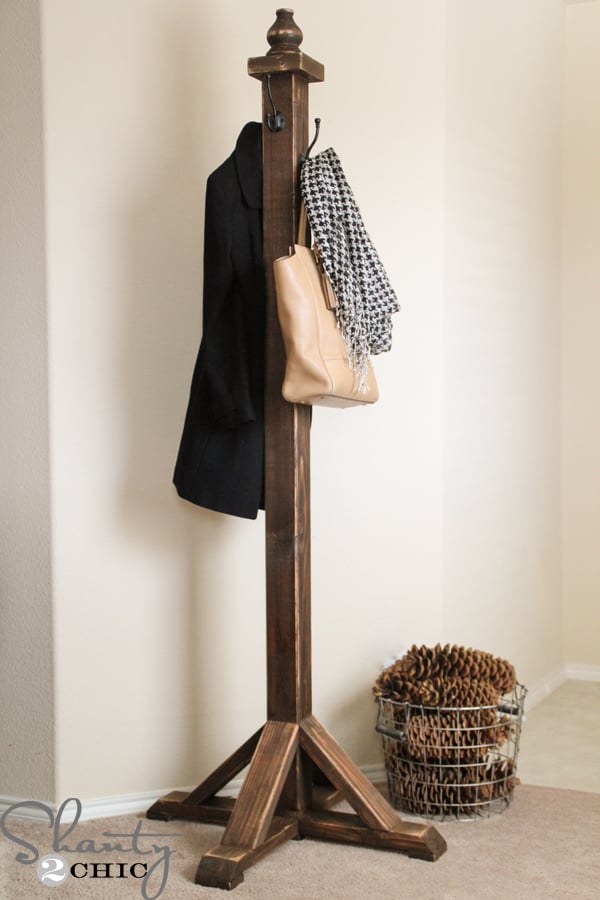
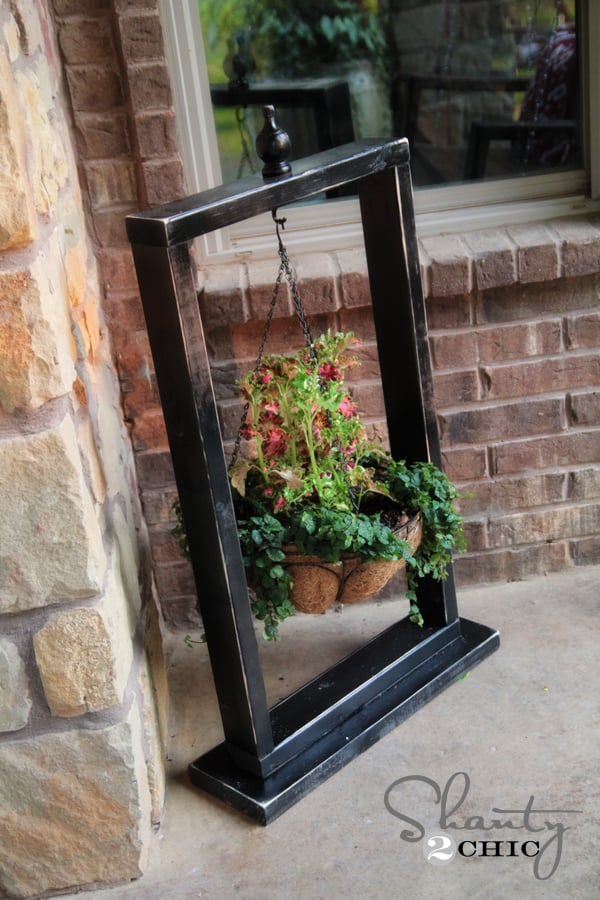
DIY Coat Rack
Hey guys!!! We are already to day 12 of the 12 Days of Christmas series (which also means Christmas is less than 2 weeks away) YIKES! We hope you are keeping up with us onInstagramandFacebook!
We LOVE our project for day 12. It was actually inspired by a reader request 🙂 Hope we don't disappoint Juanita!
With the holiday's comes company and with the winter brings coats, so why not a cute and functional spot for your guests to hang their coats! We built this handsome guy for about $30 and it was quick and EASY 🙂
The only materials you need for this piece are:
1 4×4 @ 8ft.
1 2×4 @ 10ft.
1 furniture foot
1 scrap piece of 2×6 (approx. 5 1/2″)
1 scrap piece of 1×3 (approx. 16″)
4 pretty hooks
We cut the 4×4 to 6 ft.
Look at Whit being a good DIY'er and protecting her eyes and lungs with her3M™ Safety Products! Show off 😉
Next, it was time to cut the legs. We cut 4 pieces of 2×4 at 45 degrees @ 13 1/2″ straight to long point.
Then we used our scrap 1×3 to make the feet. We made 4 cuts at 3 1/2″. *You will want these to be cut to the width of your 2×4. Because board widths vary, we suggest that you measure your 2×4 and cut accordingly.
Before we attached the feet, we laid a foot on one end of the 4×4 (flush with the bottom) and marked the spot on the 4×4. Do this on all 4 sides of the 4×4.
Now lets assemble a bit 🙂 Using Gorilla Glue wood glue and our Ryobi Airstrike nailer, we attached the 1×3 feet to the mitered end of each leg. The edges will be flush.
Then, we used our Kreg Jig to drill 2 – 1 1/2″ pocket holes on the straight end of each leg.
That was easy! We circled the pocket holes in the picture 🙂
Remember that mark we made on the 4×4? That's where we are going to line up our legs. This will allow for the thickness of the feet we added. We attached the legs to the 4×4 with Gorilla Glue wood glue and 2 1/2″ Kreg pocket hole screws.
We then followed the same steps on the other three sides of the 4×4!
For the cute braces on the rack, we cut 4 pieces of 2×4 both ends at 45 degree angles @ 13″ long point to long point, not parallel.
To attach them to the body and the legs, we used Gorilla Glue wood glue and our Ryobi Airstrike nailer.
Next, we cut a scrap piece of 2×6 @ 5 1/2″ to form a square.
And we attached it to the top of the coat rack with wood glue and 2 1/2 inch wood screws.
We purchased this fun furniture leg for the finishing touch!
Just pre-drill a shallow hole (a tad smaller than the width of the screw on the furniture foot) and we screwed it into the top of the 2×6 scrap. We did coat the bottom of the furniture foot with wood glue to secure it.
That was it for the building 🙂
We always get asked how we prep our projects before we stain and paint. We always fill our holes with3M Wood Fillerand sand the piece down with our3M Advanced Abrasives! We put this demo video together for you all just to see how easy it is!
Once the prep work was done, it was time to stain.To finish, we opted for a fave! We applied one-coat of Rust-Oleum Dark Walnut stain with a foam brush. Let it sit for 5 minutes and then wipe the stain with a clean cloth to even the color out.
We can't forget the hardware! We bought four oil-rubbed bronze hooks and attached one to each side of the coat rack!
Woohoo! What a great, easy and inexpensive DIY! We always appreciate your pins and shares 🙂 Don't forget, tomorrow is our big Giveaway day. All of the blogs in the 12 Days of Christmas series will be giving away something different and unique to their blogs!
Go visit our talented friends and see what they worked up for Day 12 and tell them the Shanty Sisters said hi 🙂
Michael ofInspired by Charmfollow
Marianne ofSongbirdfollow
Cassity ofRemodelaholicfollow
KariAnne ofThistlewood Farmsfollow
Donna ofFunky Junk Interiorsfollow
You can check out all of our latest holiday projectsHERE!
Don't forget to check out3MDIY.comon their twitter account!3M DIY Twitter Page
This post is a collaboration with 3M DIY. To keep up-to-date on projects, products and sampling visit 3MDIY.com.
Similar Plans (6)
Community Discussion
Start a DiscussionNo discussions about this plan yet.
Be the First to Discuss